The Ultimate Guide to Selling Your First Digital Product with Lemon Squeezy [2023]
If you’re looking to sell digital products, you may have heard of platforms like Gumroad, Etsy, ThriveCart or WooCommerce. There are so many options out there for selling your product, it can be hard to decide which one to use.
In this post, I’ll be covering Lemon Squeezy — a great and easy option for your ebook, template, video or any digital product that you want to sell.
Just a note that I’m not a Lemon Squeezy affiliate, just a big fan!
Wondering about other tools for creating, launching and marketing your first digital product? Get my 2-page resource guide with a round-up of the best tools.
An overview of Lemon Squeezy
Lemon Squeezy is an e-commerce platform that specializes in digital products and subscriptions. It also supports free lead magnets and pay what you want products.
Although not as well-known, it’s a great alternative to Gumroad, a platform you may have already heard of!
Some of my favorite Lemon Squeezy features are:
- No initial fees and no ongoing monthly fees for digital products or subscriptions
- Lower fees than some other platforms — 5% + 50¢
- The merchant of record so you don’t have to worry about remitting taxes
- Well-designed storefront
But there are a few drawbacks:
- No place to have customers accept a terms of service before purchase
- Payouts occur at $50, so if you have a very low-priced product, you may not see your money for awhile unless you have a lot of sales
6 setup steps
It’s super easy and intuitive to sell your digital product with Lemon Squeezy. There are six setup steps, and really only four of them are necessary to get up and running.
Create your store
The first step is to register for a new account. You’ll be prompted to enter your name, email and password. You’ll also have to verify your email address by clicking the link in the email they send you.
Once you verify, you’ll enter the basics for your store — the store name, initial URL and country you’re based in.
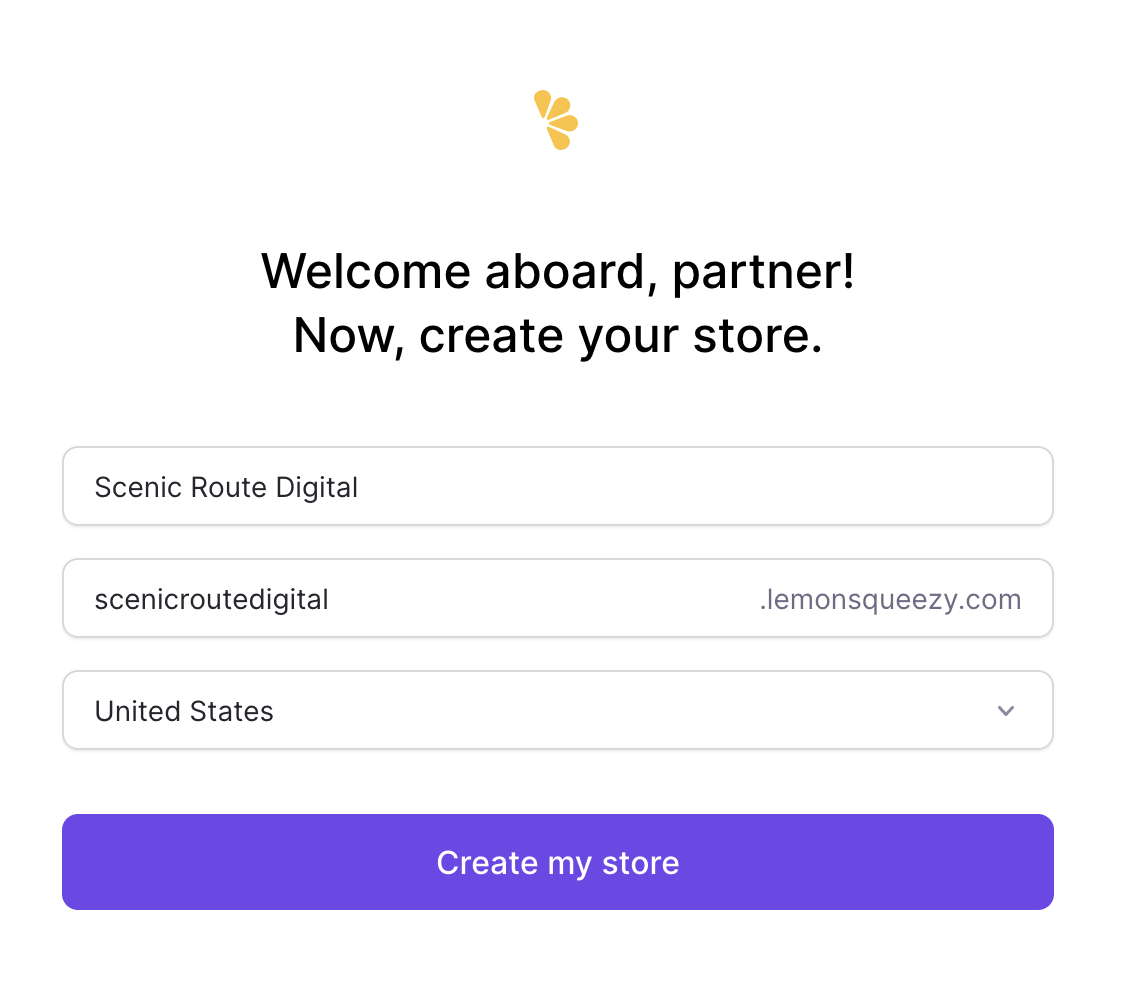
You should get a welcome email within the hour with your store URL as well as your admin login URL so you can edit your store and products.
You can also add a custom domain or subdomain later if you choose to use the storefront feature (more on the storefront feature below).
Fine tune your store settings
The second step is to fine tune your store settings. Access Setup any time from the left sidebar.

Click the Store Settings button on the right or click Settings, General in the left sidebar. Upload an avatar and add a support email address to your account.
You can also look through the other settings:
- Domain — add a custom domain
- Integrations — connect with Mailchimp, ConvertKit or Zapier **
- Webhooks — listen for events and trigger reactions
- Email — activate their email marketing feature
- Affiliates — allow others to promote your product on your behalf and earn money
- Recovery — manage abandoned cart and other automatic emails for subscription products
- Plans — get information on current fees and to choose an email marketing plan
- Billing — add a billing card if you’re subscribing to an email marketing plan
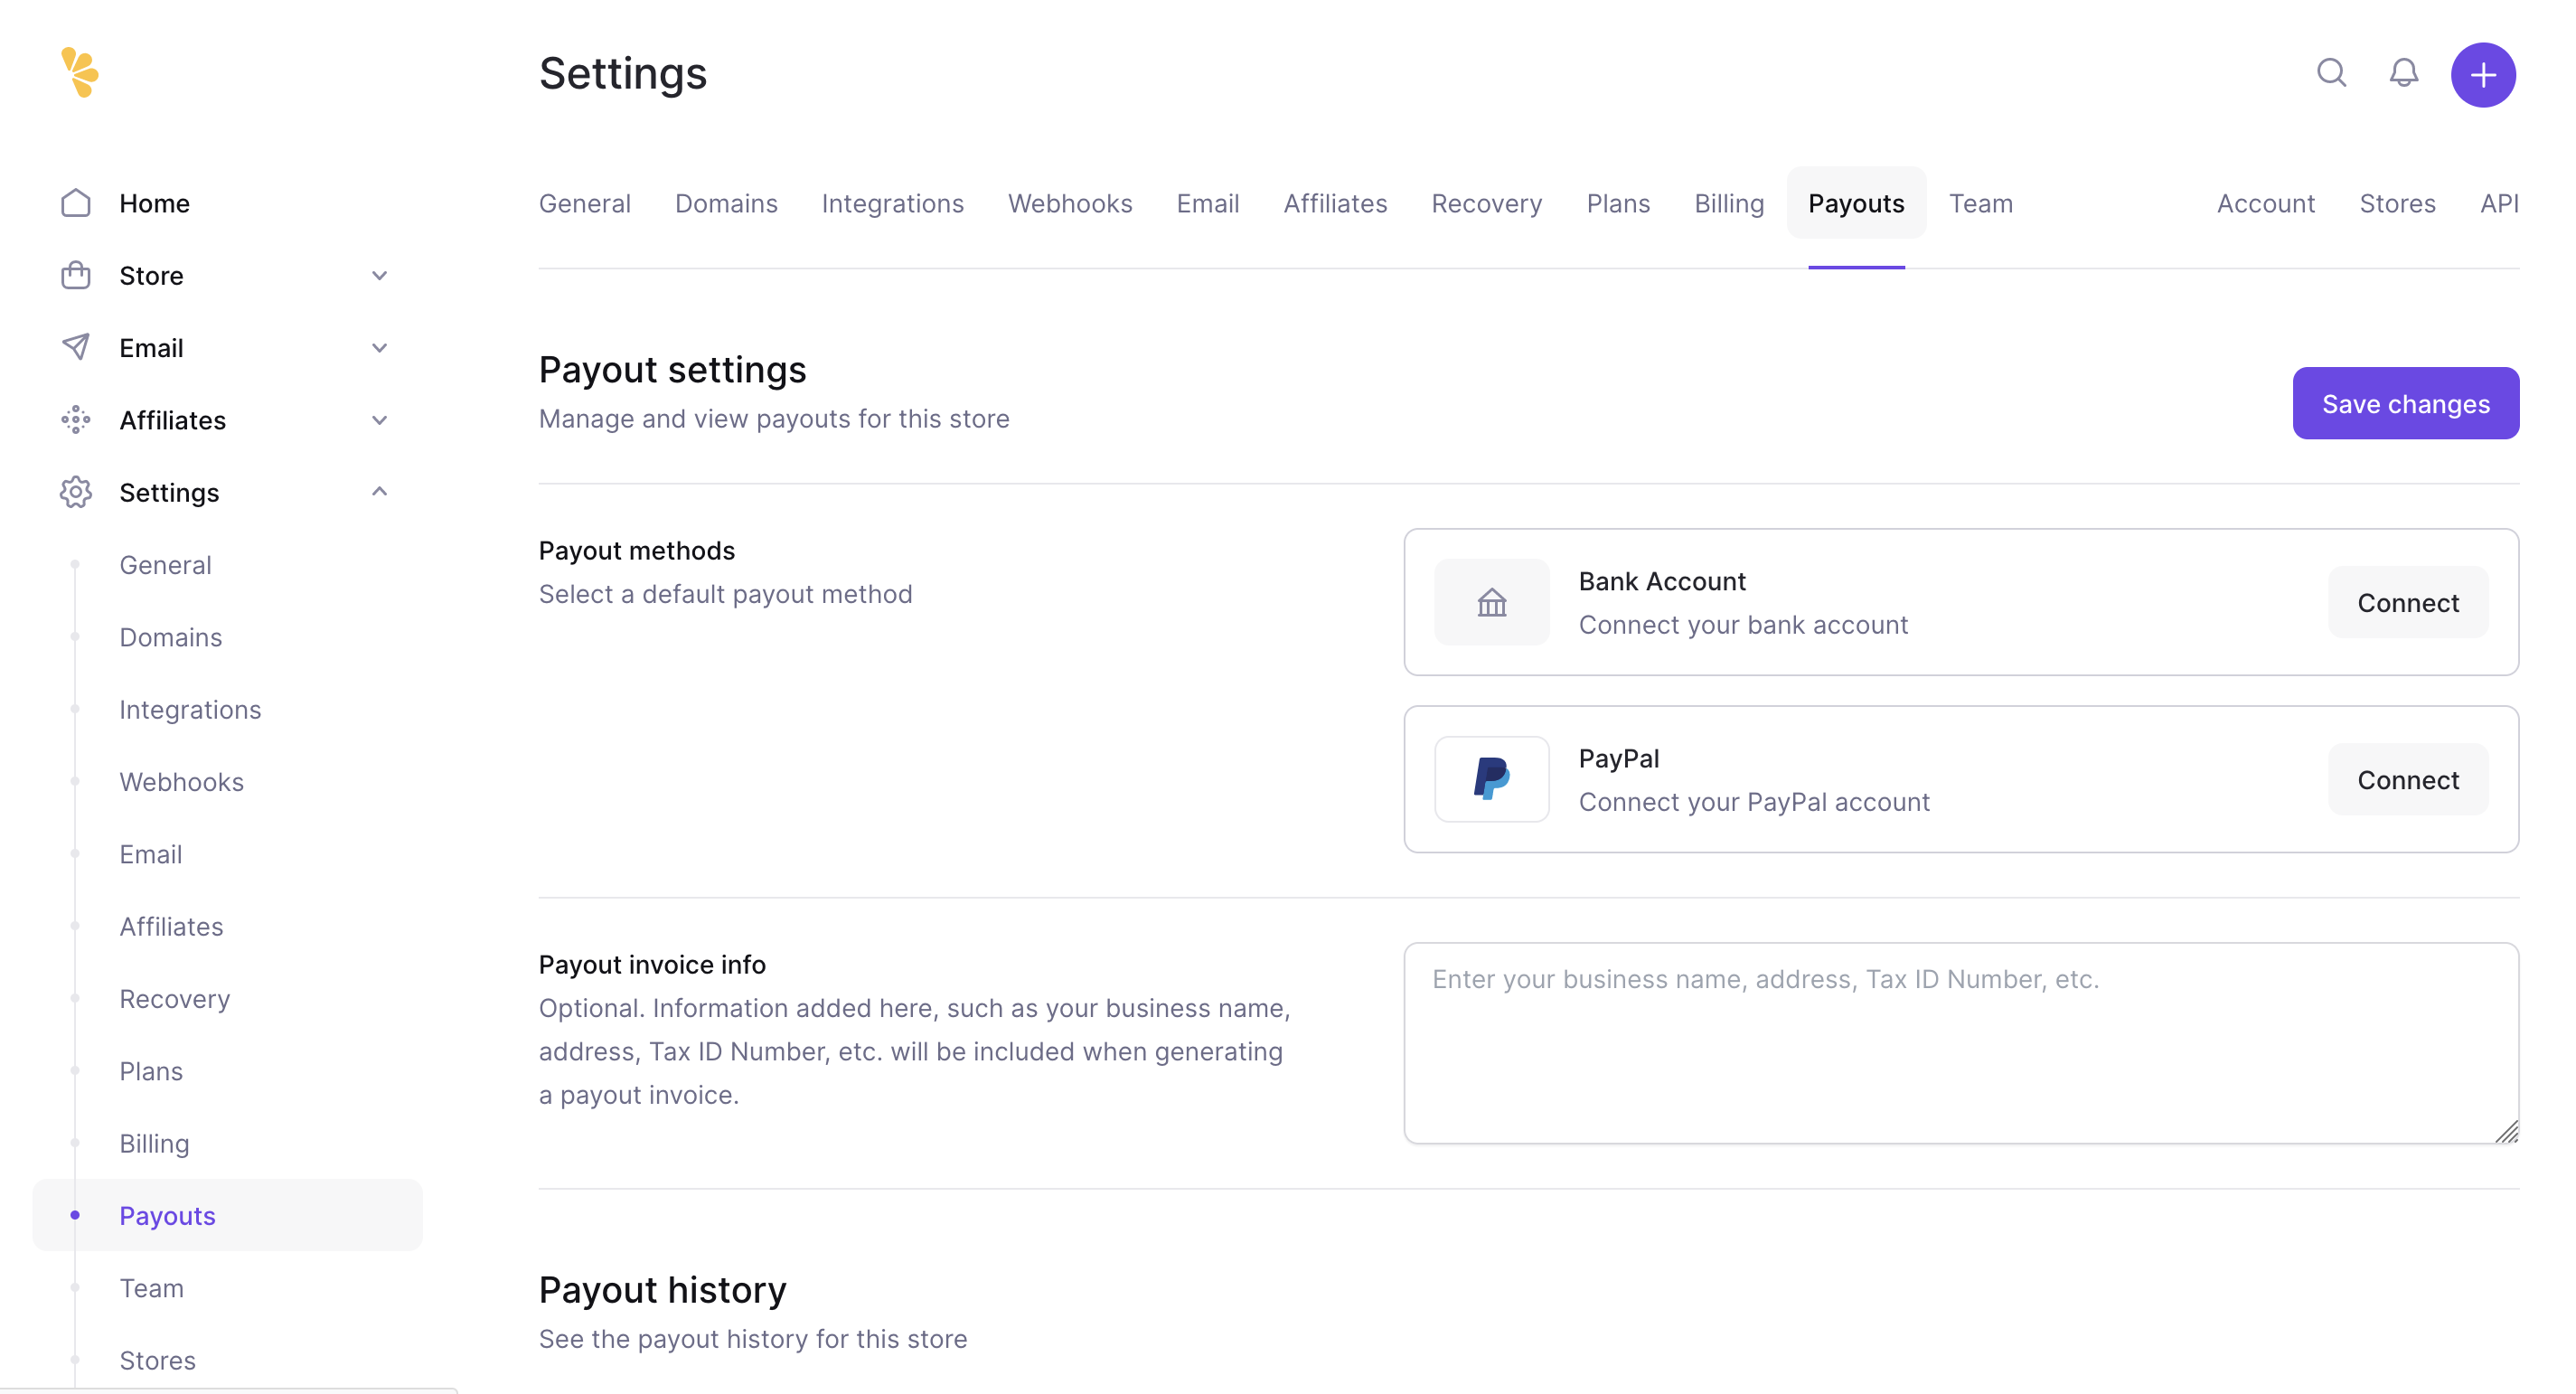
- Payouts — manage and view payouts, connect your bank account and/or PayPal account and add invoice information *
- Team — invite team members
* If you’re just getting started, Payouts is the only area you need to investigate! This is also step 6, connect a bank account.
** The second most important feature here is Integrations if you have a Mailchimp or ConvertKit account or you want to use Zapier to connect to your email marketing platform. I highly recommend sending some follow up emails after a purchase is made and adding people to your main list.
There are also three options on the right side — Account, Stores and API. You can get also back to these by going to your avatar on the bottom left, then clicking My Account.
Here you can change your name, email, avatar or password; create a new store or switch to an existing store; or create a new API key to authenticate your app.
Activate your store
The third step is to activate your store. You can do this on the left sidebar or by clicking the Activate Store button when you’re on the Setup screen.
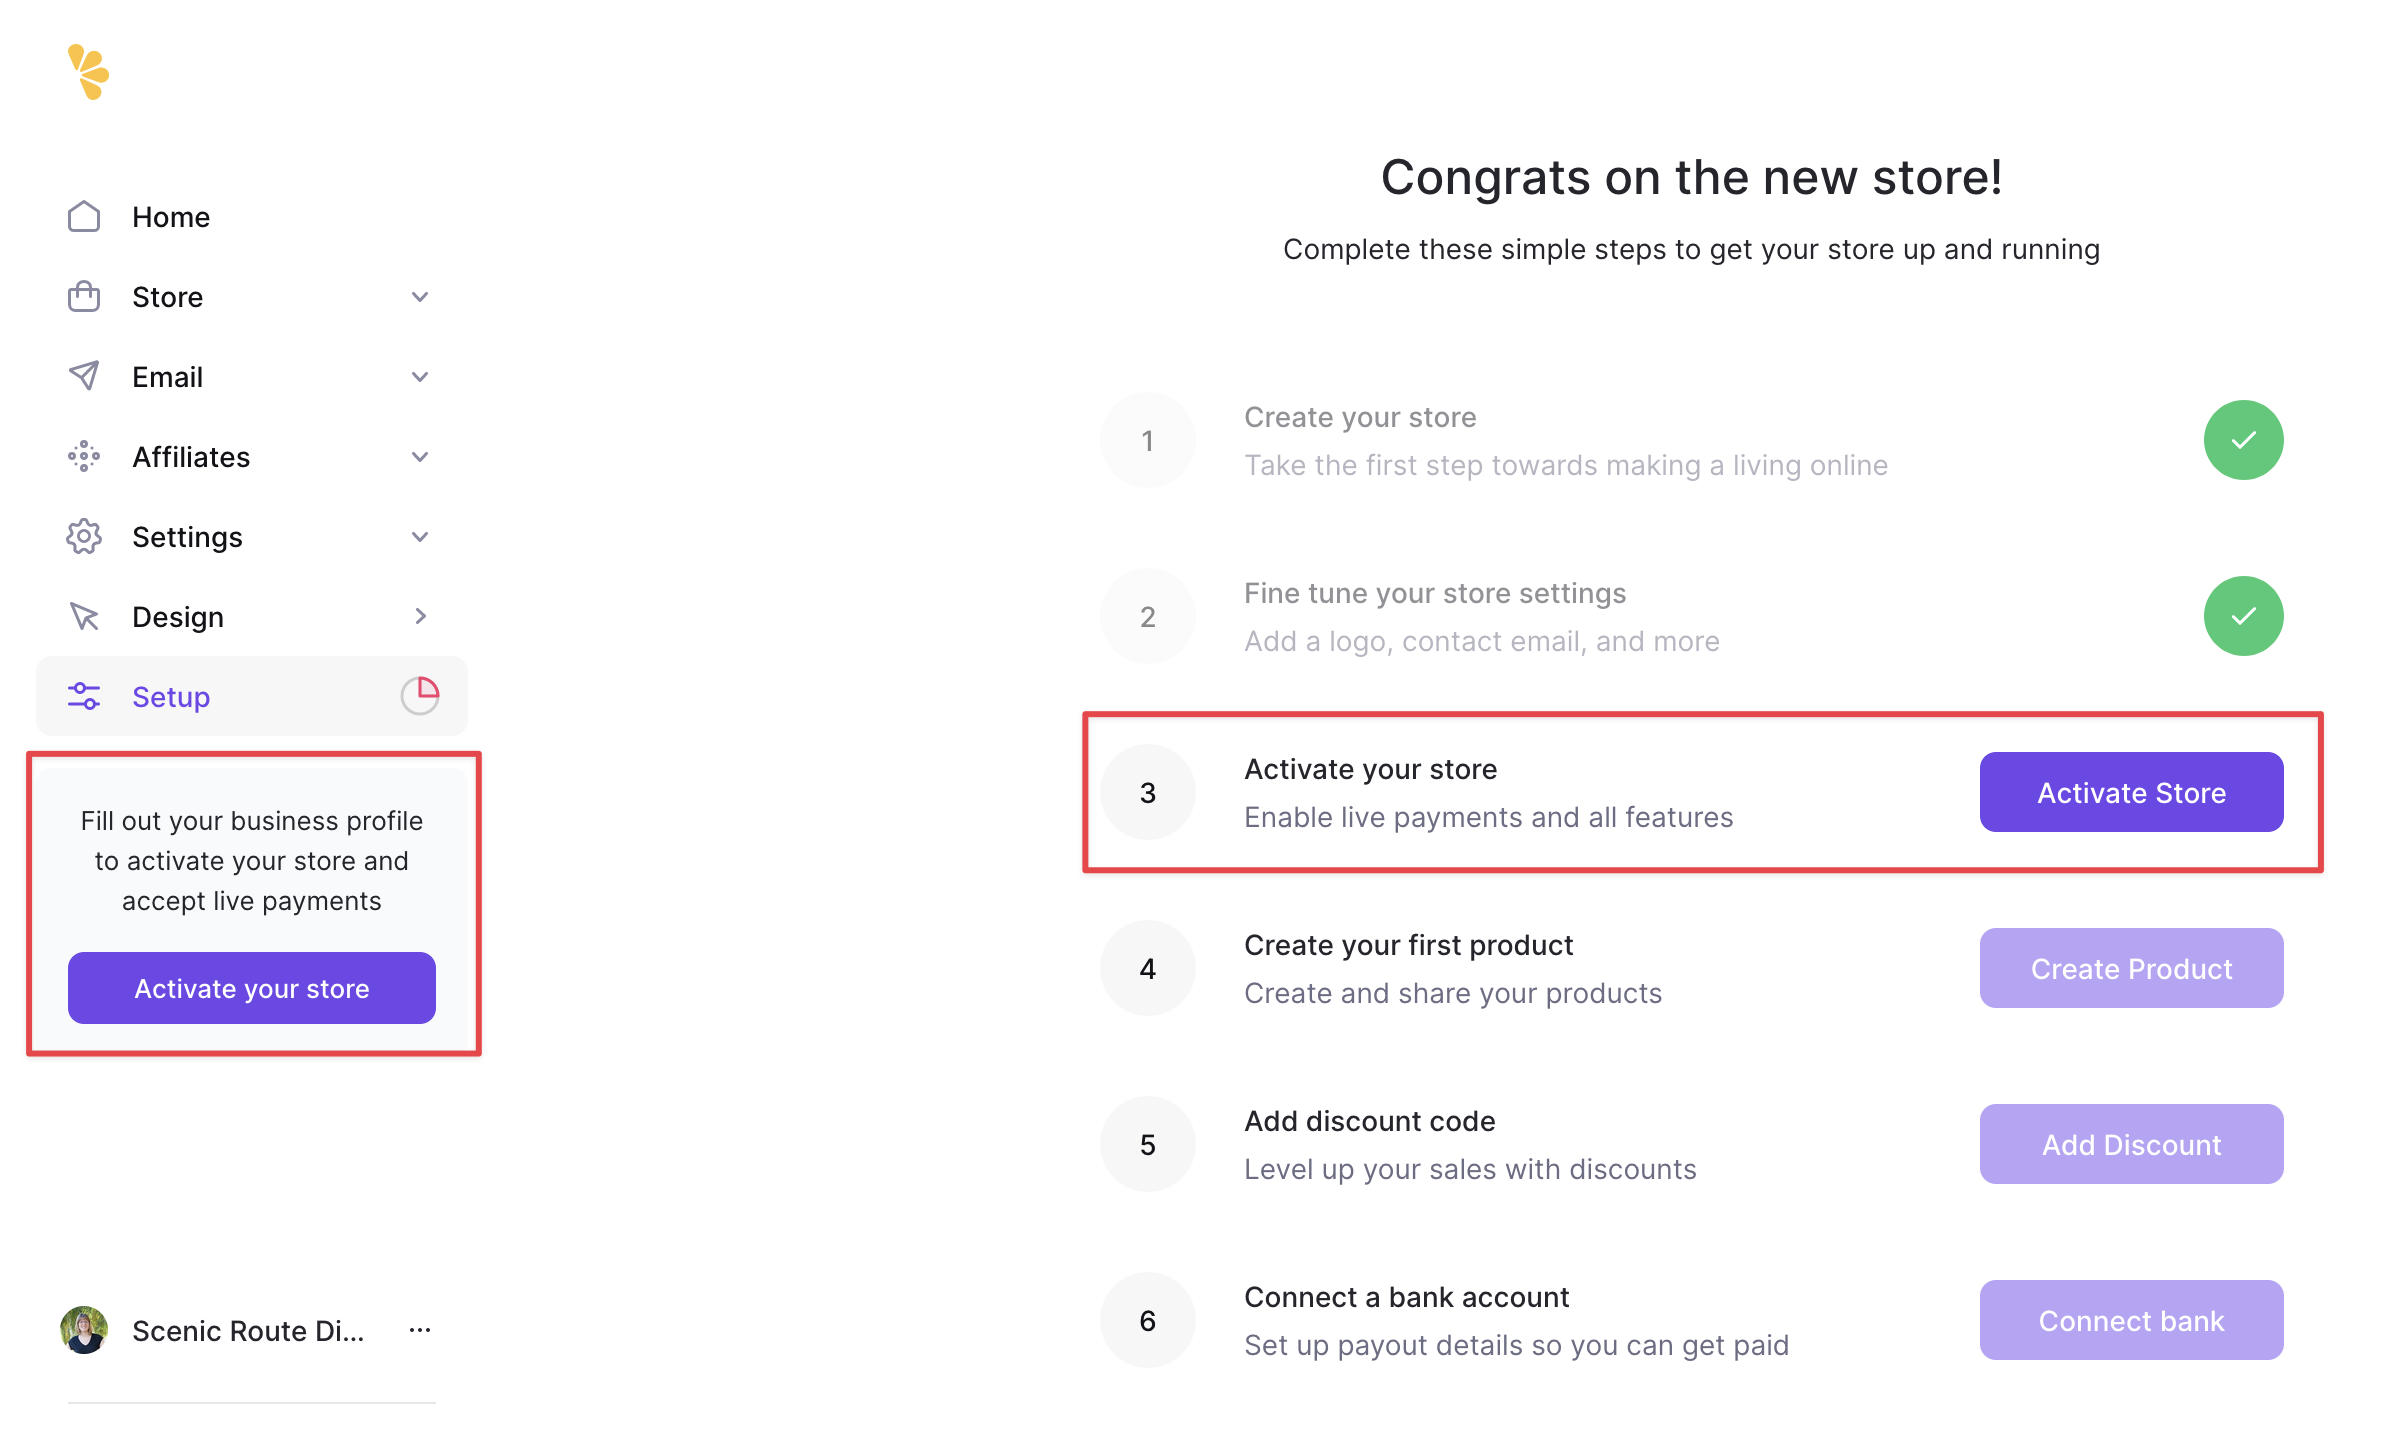
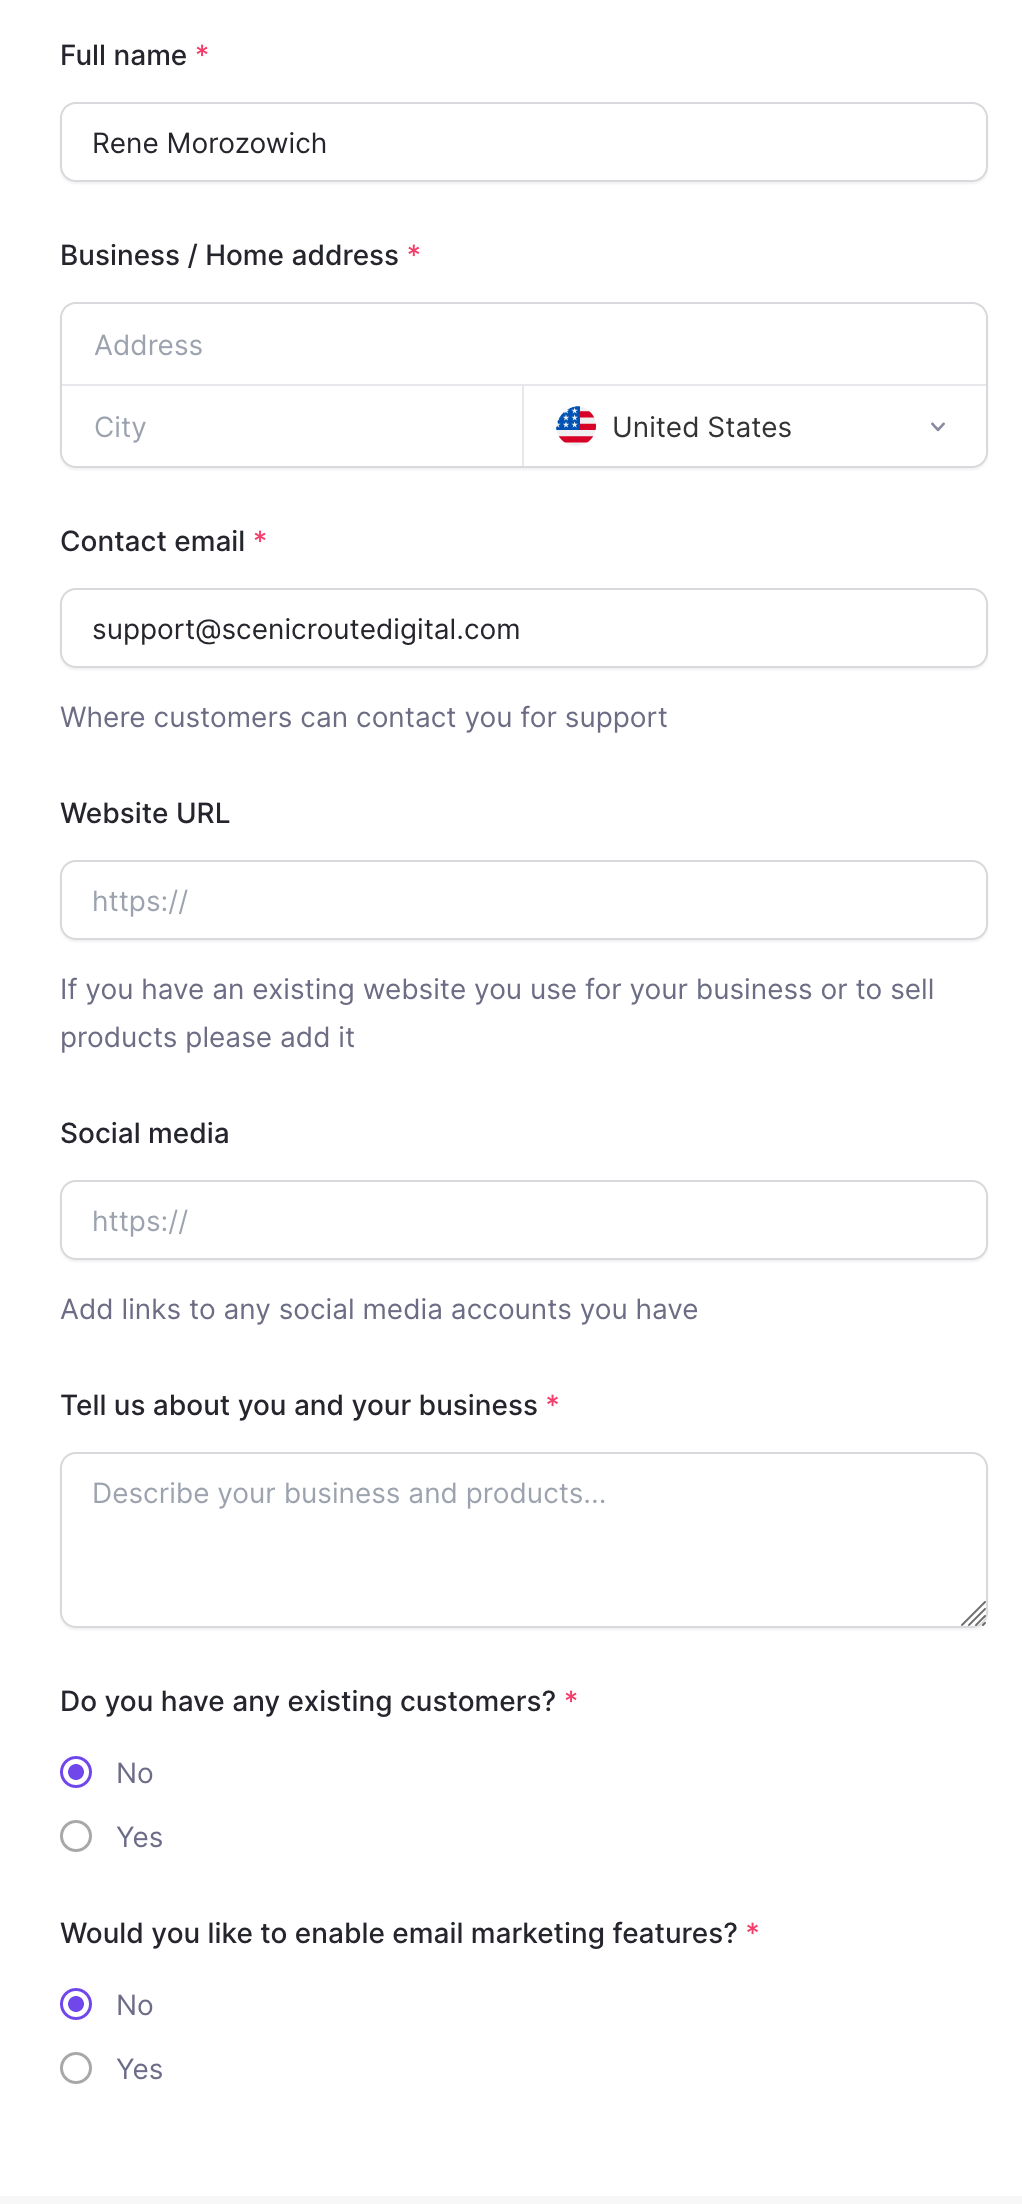
Here you’ll need to add your name, address, email, website, social links, share a little bit about your business, say whether you have existing customers and choose if you want to turn on the Lemon Squeezy email marketing features.
Once you fill this out, Lemon Squeezy will review your request and get back to you within 1-2 business days.
Create your first product
You’ll need to wait for your store to be approved before adding your first product, but you can get everything ready in the meantime.
You’ll need:
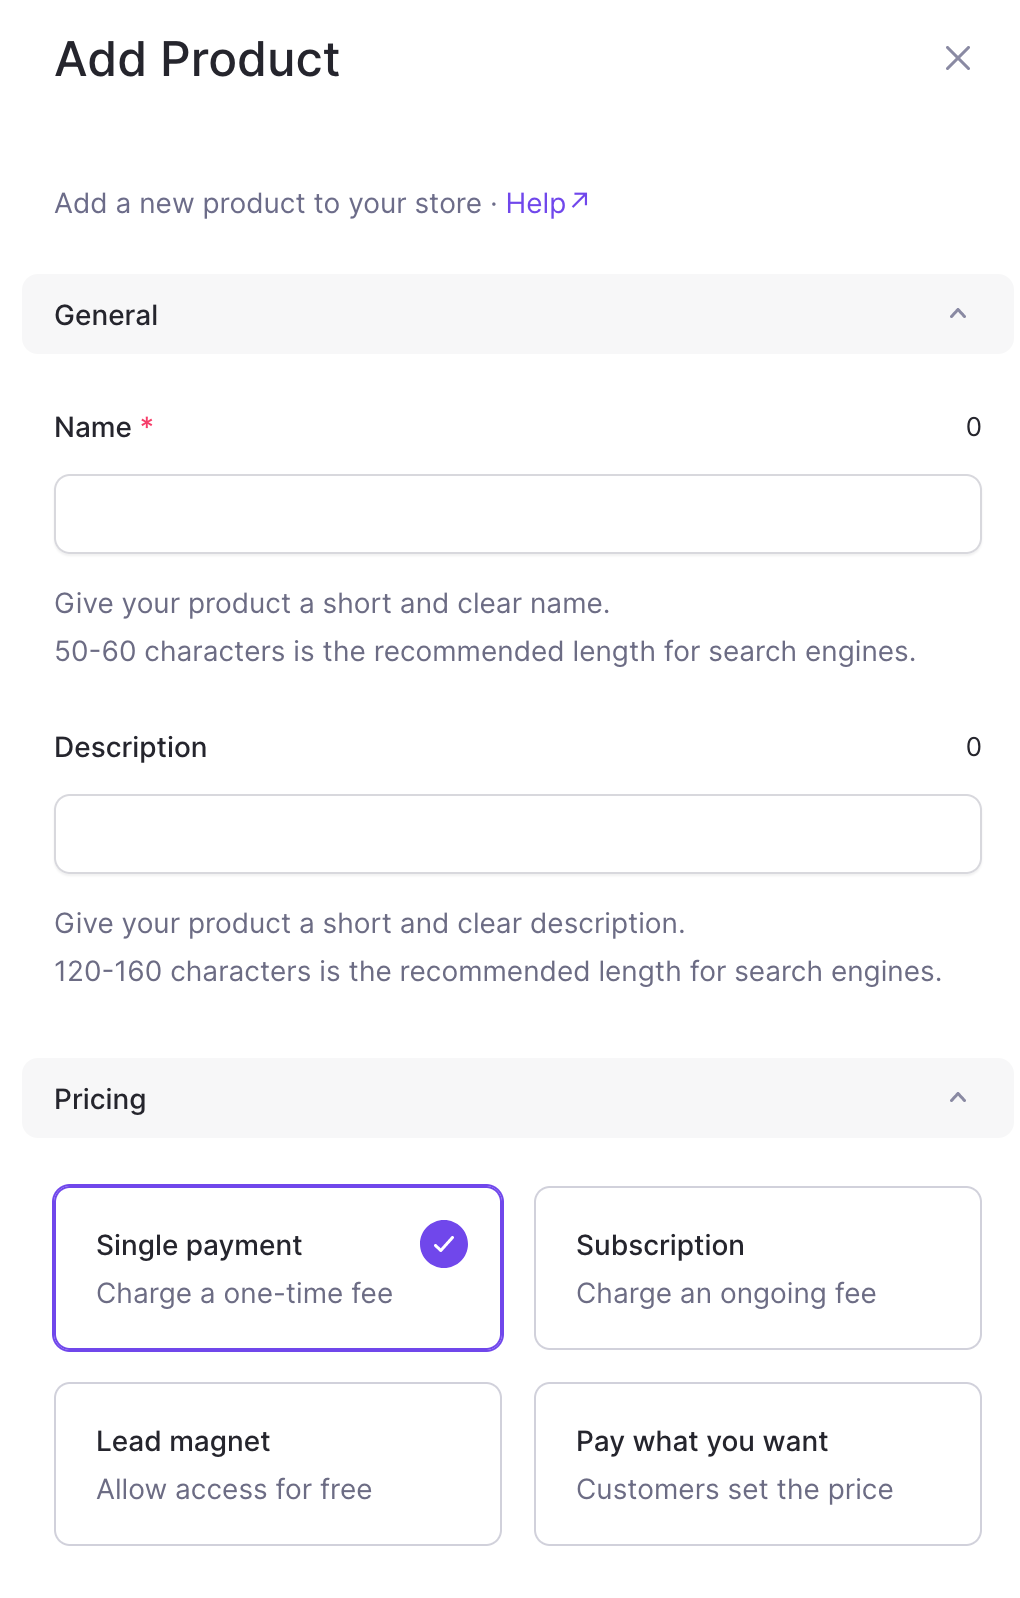
- Product name — short, clear and 50-60 characters in length for search engines
- Product description — also short and clear; 120-160 characters is the recommended length for search engines. In my opinion, that’s not a lot to describe your product and I have added more in the past
- Pricing model — single payment, subscription, lead magnet (free) or pay what you want. For our purposes here, let’s choose single payment
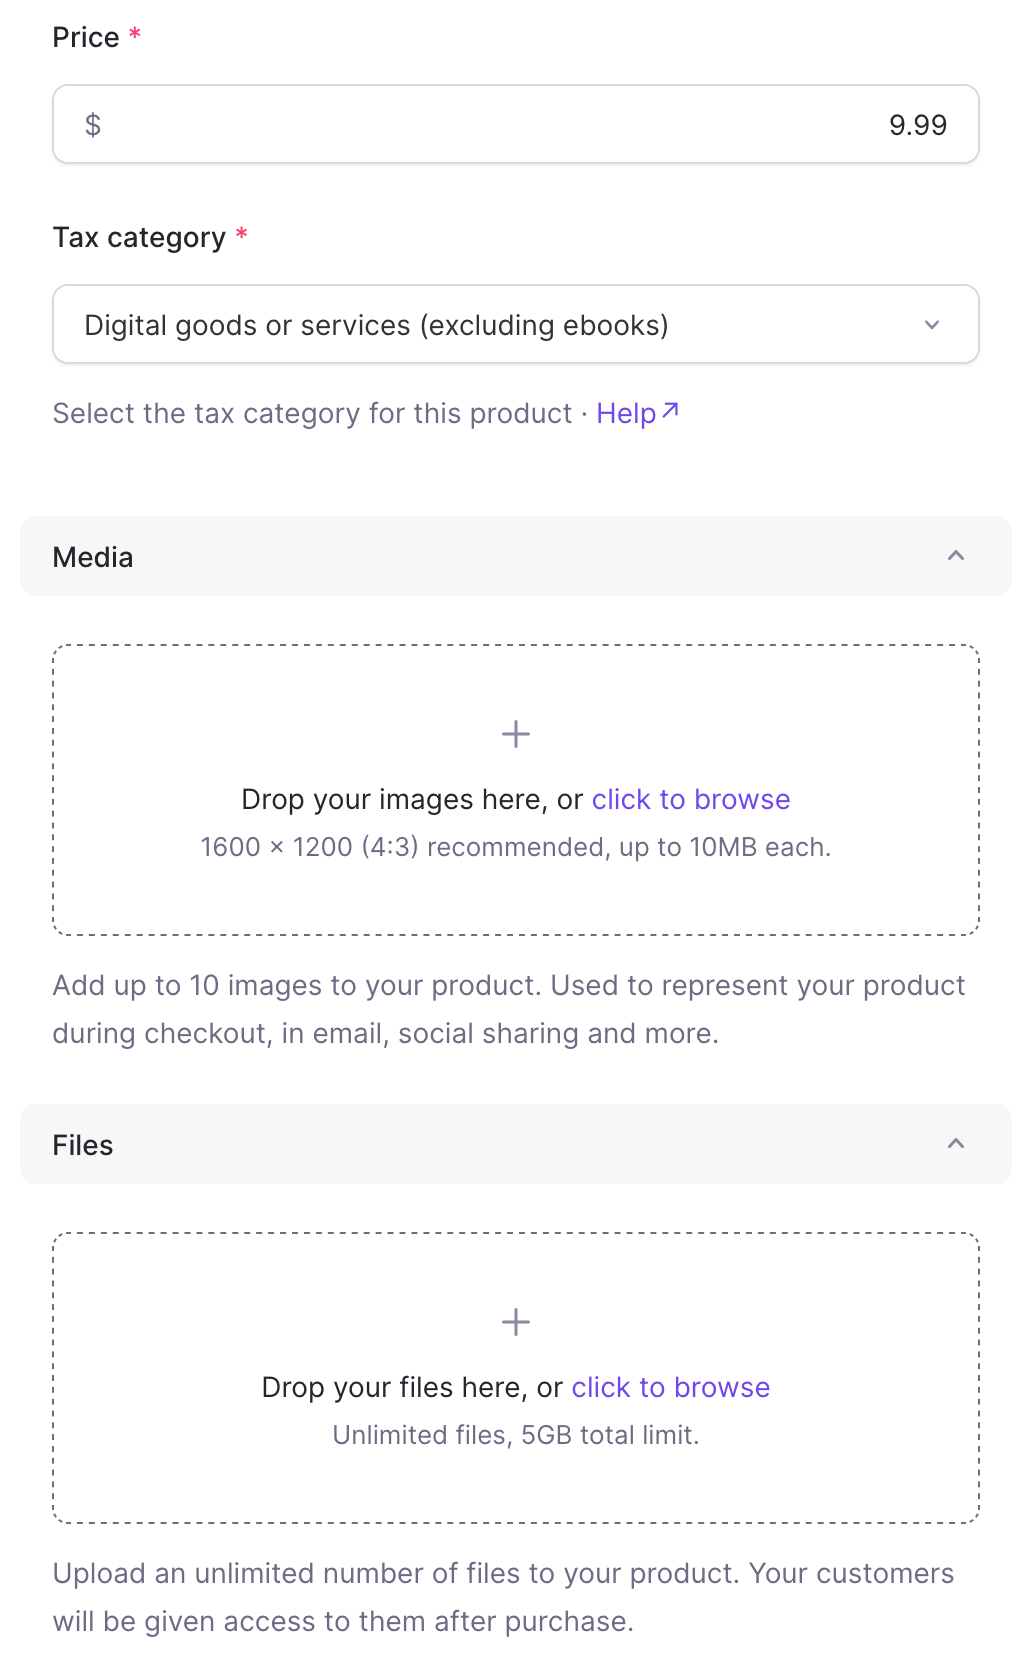
- Price — you may have to experiment with this; it can be hard to determine a price for your first product
- Tax category — for our purposes, choose “Digital goods or services (excluding ebooks)” or “Ebook”
- Images — up to 10 images of your product; used to represent your product during checkout, in email, social sharing and more. These should be 1600 x 1200 (4:3) and up to 10MB each
- Files — the digital product you’re delivering. You can deliver an unlimited number of files, up to 5GB total. I’d probably stick to one or as few as possible. Don’t forget to include some type of instructions on how to use the product, either with the product or as a separate file
There are some additional settings here including variants (different options for price, version, format, license type, size, shape, etc.), license keys, redirecting after purchase, adding the product to your storefront and how the receipt is displayed.
Once you have that information ready and once you’ve been approved, go to Store, Products and click the plus sign to create a new product.
Enter all the information you already gathered and publish your product!
Add discount code
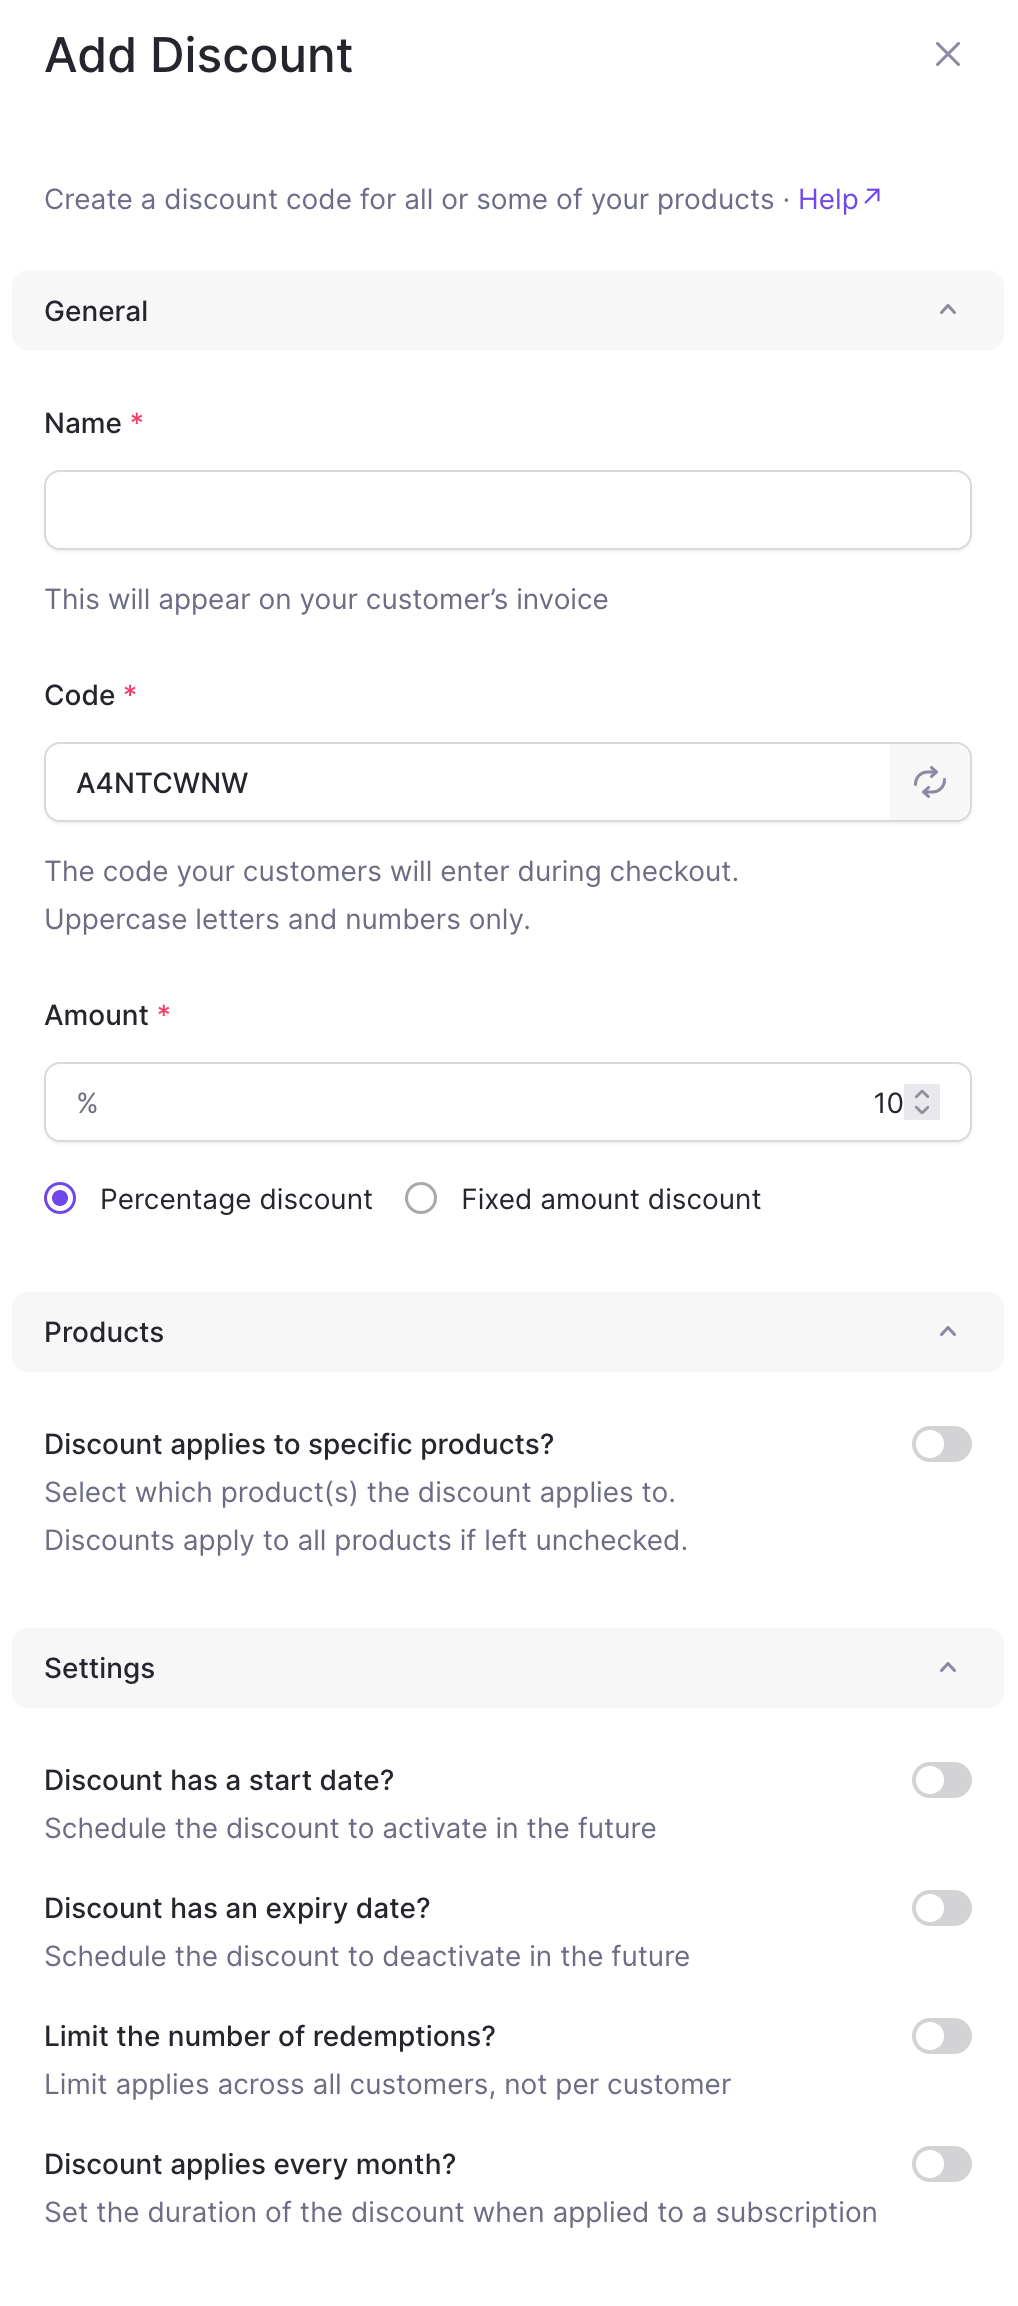
This step is optional, but is step 5 on the checklist. If you want to add a discount code, enter:
- Discount name — shown on the invoice
- Discount code — they will automatically generate one for you, but you can also enter your own
- Amount — a percentage or fixed amount
- Products — choose the product(s) that the discount applies to
- Settings — start date, expiration date, number of redemptions and if a subscription, if it applies every month
I recommend limiting the coupon code in some way — either by expiration date or number of uses.
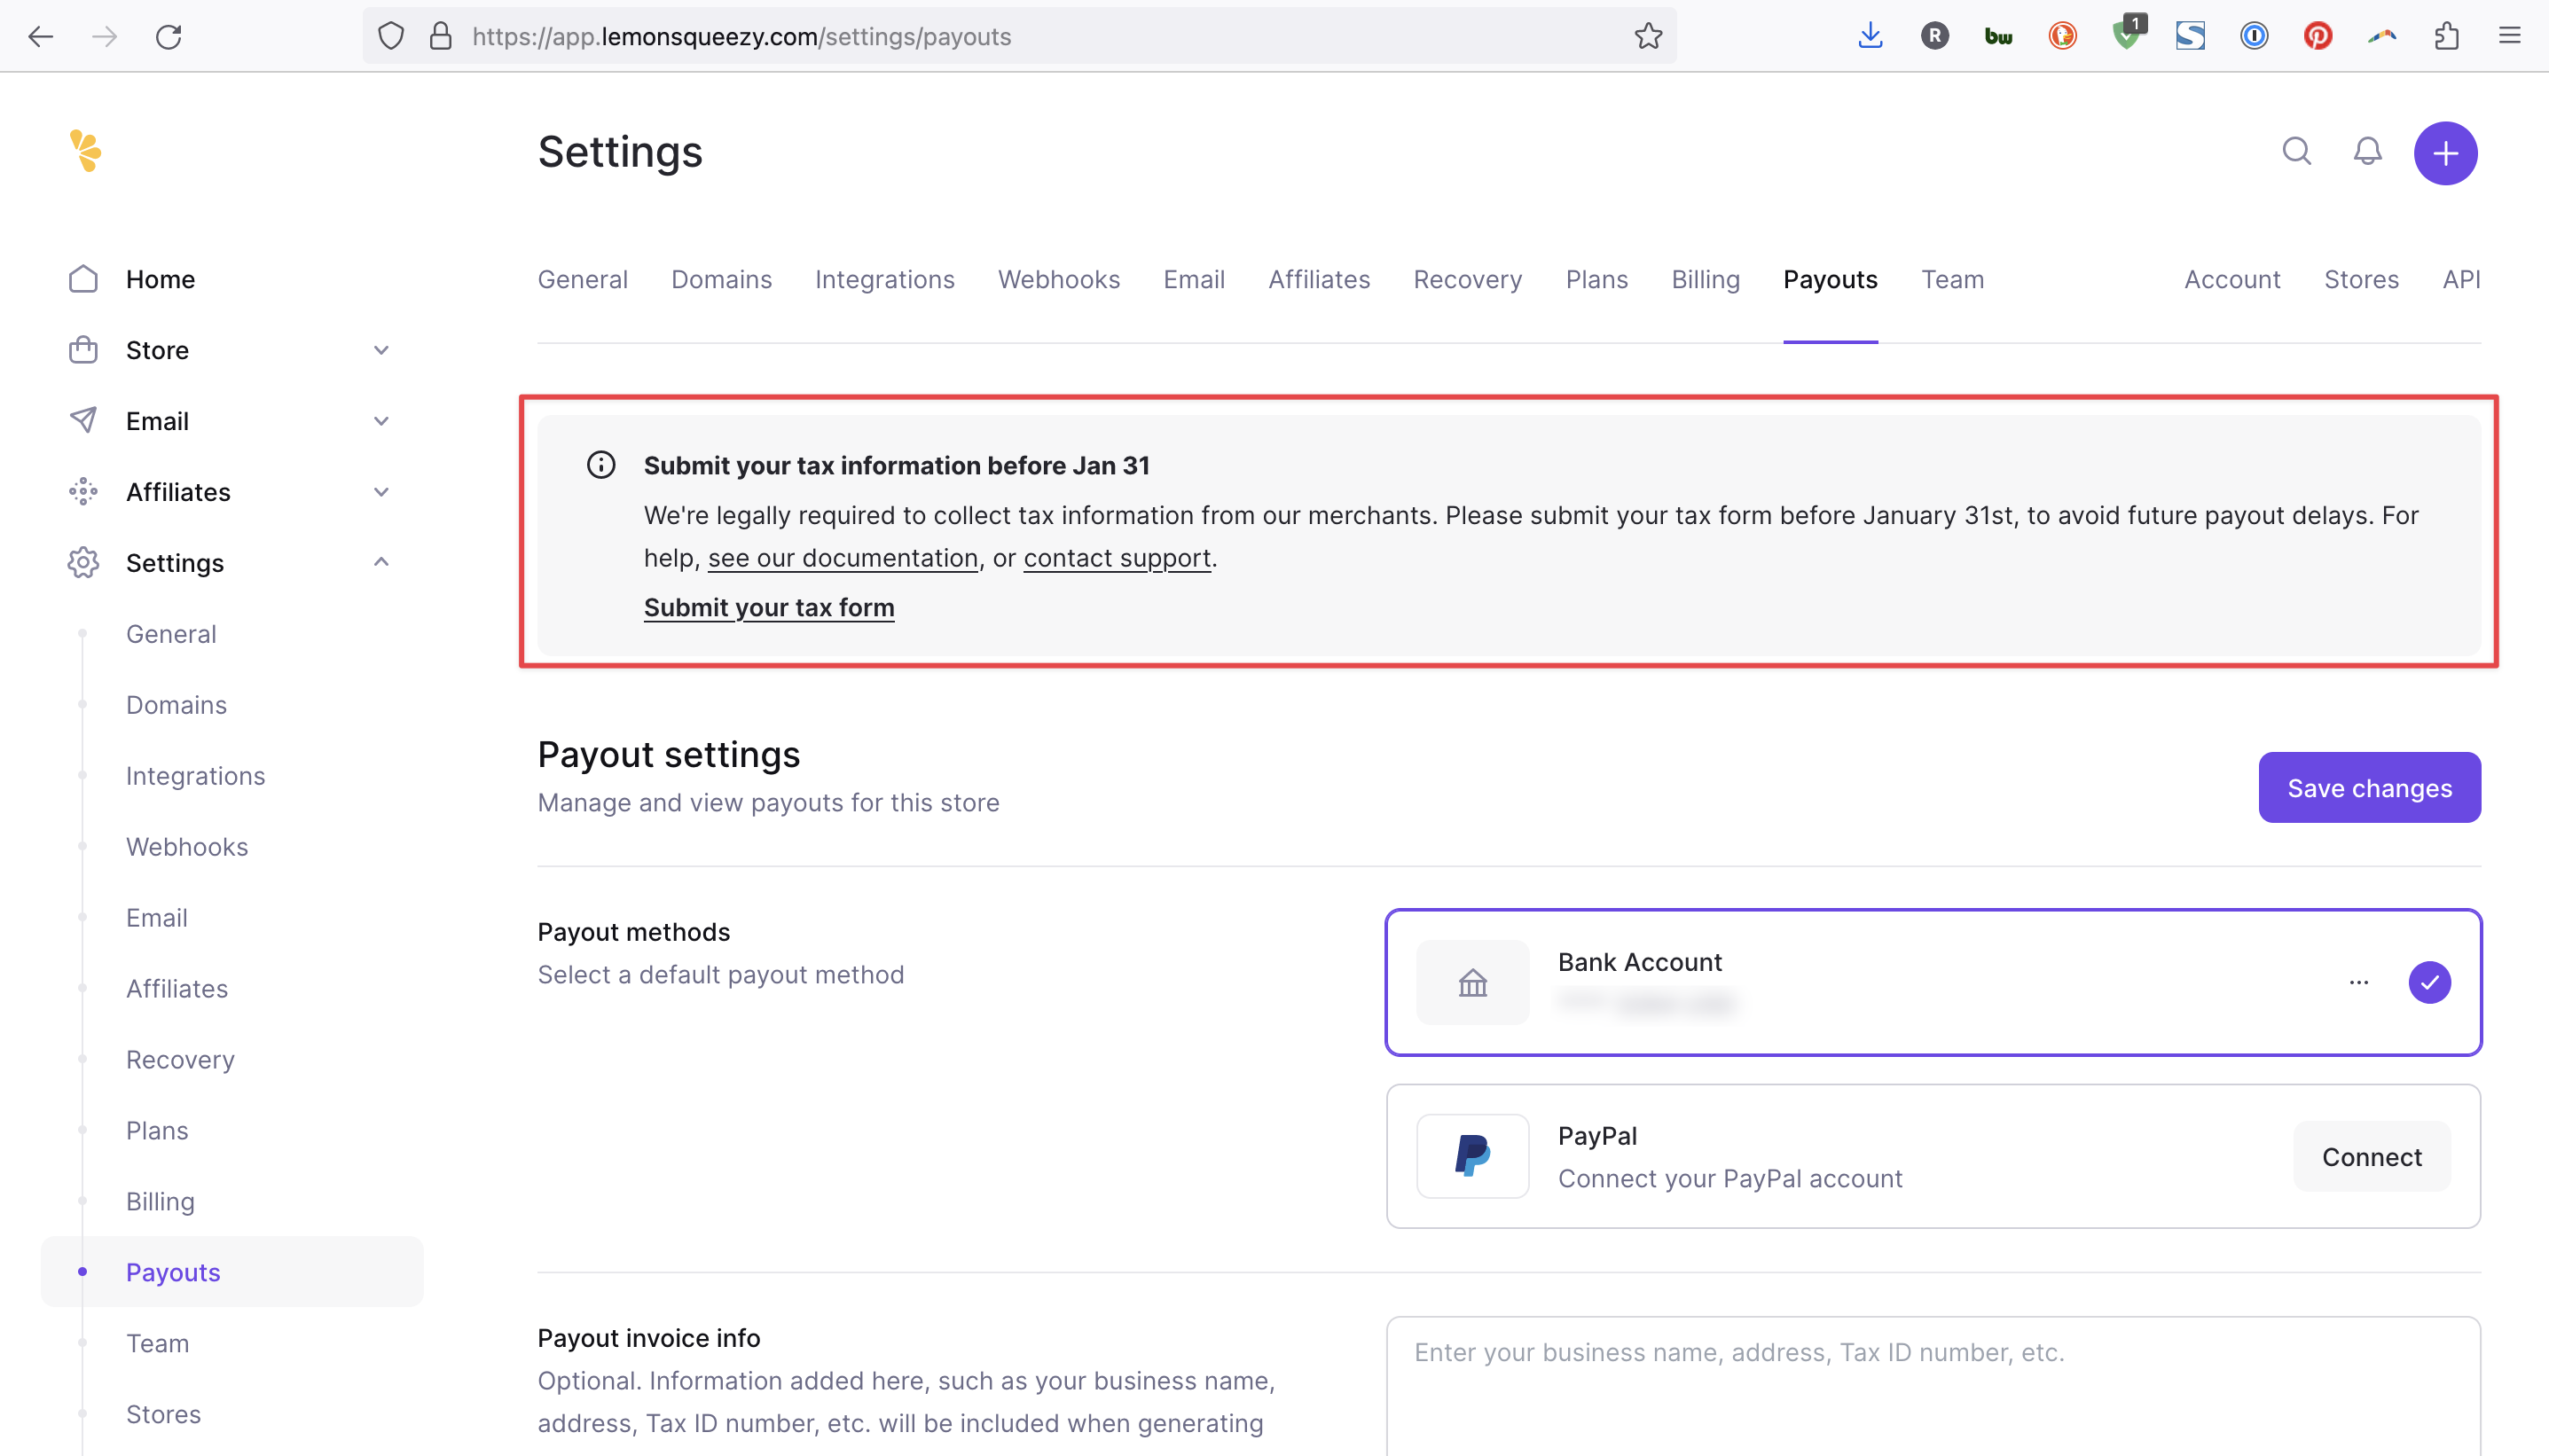
Connect a bank account
The last item on the checklist is to connect a bank or PayPal account. Click the Connect bank button on the setup screen or go to Settings, Payouts.
See the payouts image above for a screenshot.
Testing your product
Once you add a product, it’s a great idea to test to make sure everything is working properly before you share it with the world.
Test mode is enabled initially and can be turned on any time on the bottom left of the sidebar. When you go to purchase a product, you’ll see an orange banner at the top that says, “Test mode is currently enabled.”
Typically you can enter any credit card number or 4242 4242 4242 4242, a valid expiration date and any verification code and the “payment” will process.
Design your storefront
You can choose whether to use the Lemon Squeezy storefront (the main URL you chose at the beginning or a custom domain) or redirect to another website.
You may not want to use the storefront and just link to specific products from your website, in your emails or on social media. In that case, go to Design on the left sidebar, toggle off Enable your store and enter a URL to redirect to. See the next section for more on how to share specific products.
If you want to use the storefront, go to Design on the left sidebar, toggle on Enable your store and customize the following options:
- Show a store header — create and upload an image that’s 1600 x 300 (16:3) and up to 10MB max
- Show store logo and name — it’s recommended to show these
- Show store description — give your store a short, clear description
- Show the subscribe form — only if you’ll be using the email marketing feature
- Choose the thumbnail size for your products — small, medium, large or full
- Show product details — instead of just image, title and price

Share your product
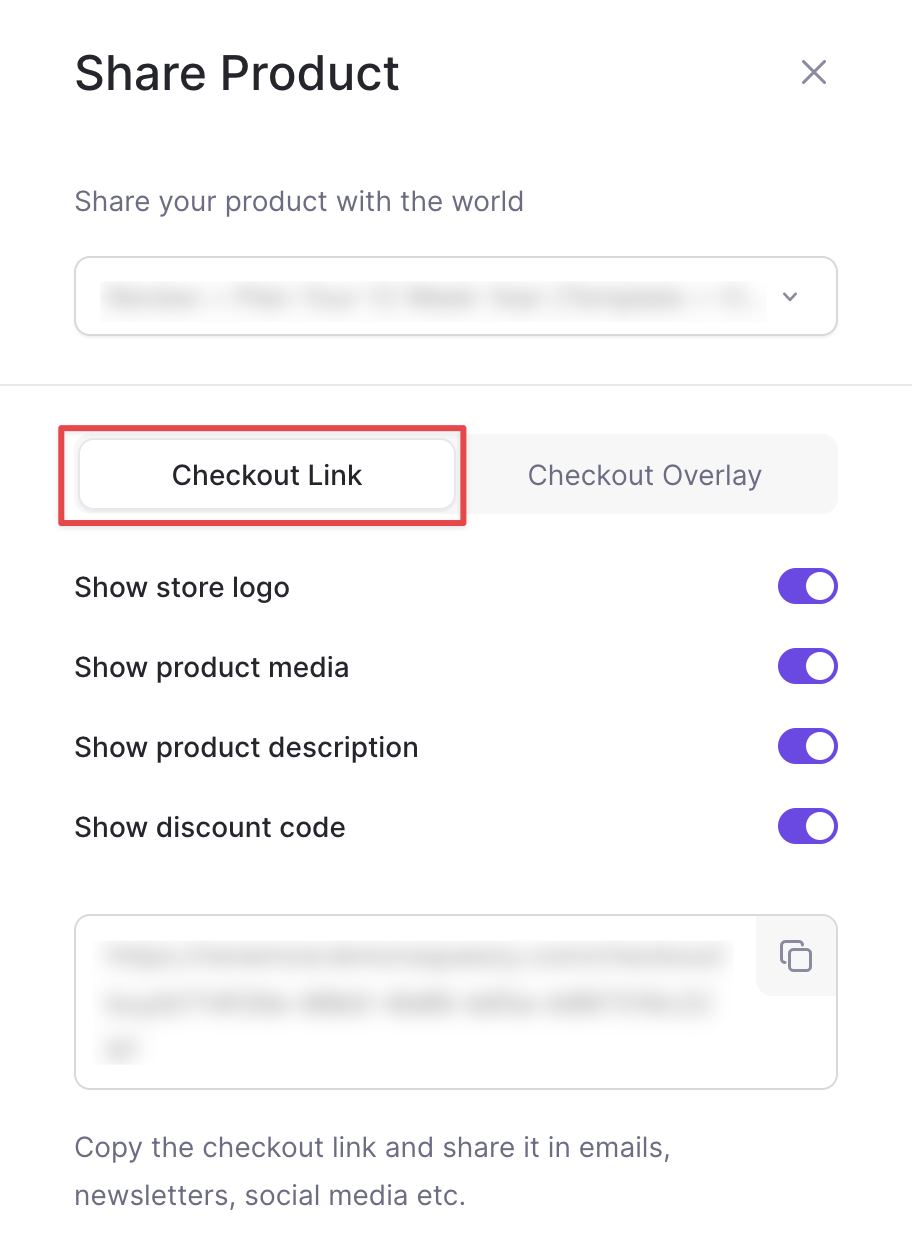
If you choose not to use the storefront feature, go to Products and click the Share button next to the product you wish to share.
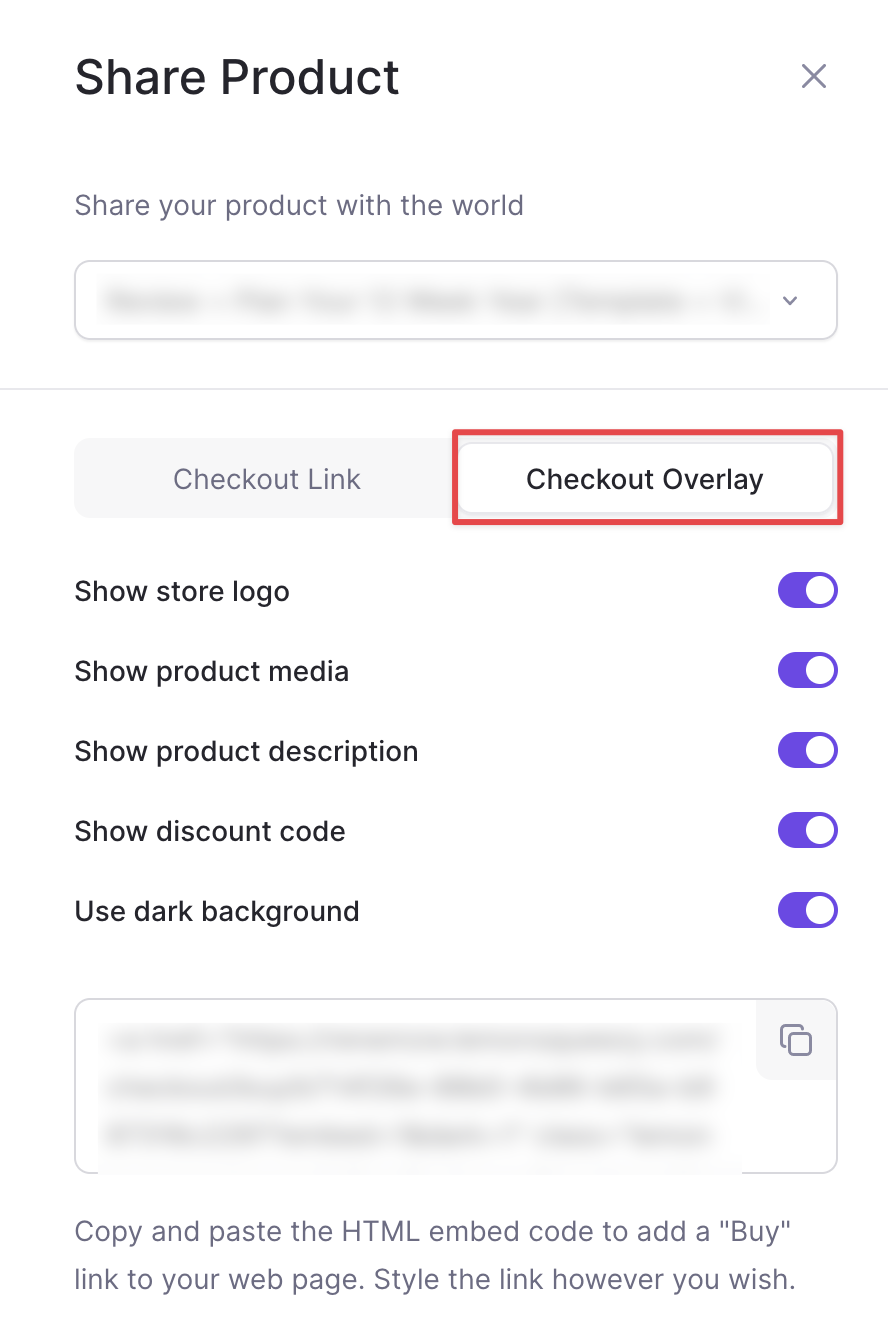
There are two ways to share your product:
- Checkout link — customize and copy the checkout link and share it in emails, newsletters, social media or wherever you like. This will direct people to your product page
- Checkout overlay — customize and copy the HTML embed code to add a “Buy” link to your web page. Style the link however you wish by customizing the
lemonsqueezy-buttonclass. When someone clicks the link, a popup/overlay will appear where they can enter their payment information and purchase without leaving your site
YouTube video
Rather watch a video? Check out this recent YouTube live I held all about selling digital products with Lemon Squeezy.
January 2024 update on taxes
Lemon Squeezy is required to collect certain information so that they can generate tax forms for you as a merchant.
Learn more about the tax forms you may need to submit.
Final thoughts
Lemon Squeezy can be a great option if you’re just getting started with digital products, especially to test out if your product is viable.
Check out their documentation for answers to all of your questions and follow them on Twitter at lmsqueezy.
If you have questions about creating, selling or marketing digital products, get in touch!
Wondering about other tools for creating, launching and marketing your first digital product? Get my 2-page resource guide with a round-up of the best tools.